RV Roof Maintenance
This article is going to focus on the general maintenance of an RV roof. It sounds much more daunting than it really is. I typically do an inspection of my RV’s roof twice a year. It is important to do this quick inspection because it can save you a lot of time and MONEY later. The rubber roof on a travel trailer is very durable. About the only thing that really damages an RV roof is large hail and tree branches (or you scraping it on something).
To do this inspection simply get on a ladder look at your roof. It is always a good idea to give the roof a once-over to be sure that there are no holes in it. Holes mean the potential for leaks and leaks mean $$$!
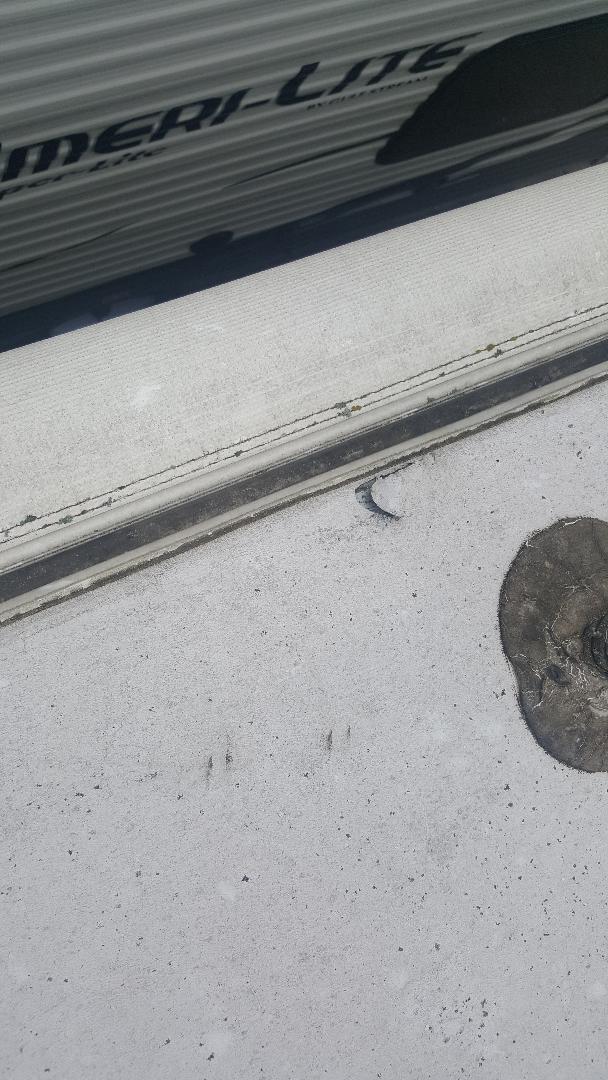
Tear in the rubber roof.
Next look at all of the caulking on the roof. Inspect the caulk around the corners and around any protrusions through the roof (like vents). Pay special attention to the front and rear corners on the camper.
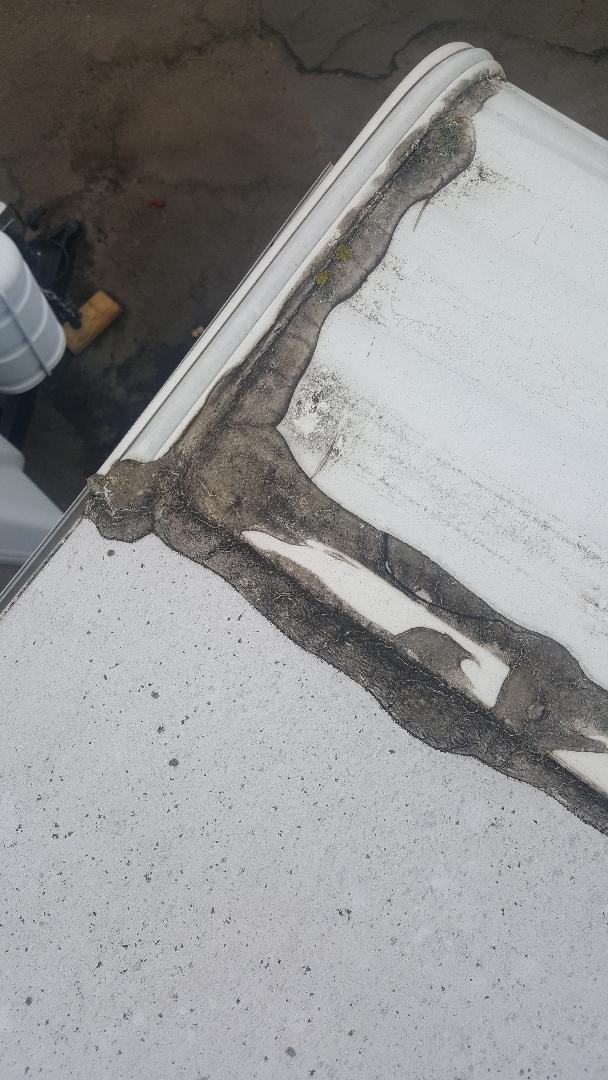
Pay special attention to the caulking on roof corners.
Also, be sure to check the roof on top of any slide rooms. What you are going to be looking for are cracks, or gaps, in the roof caulk.
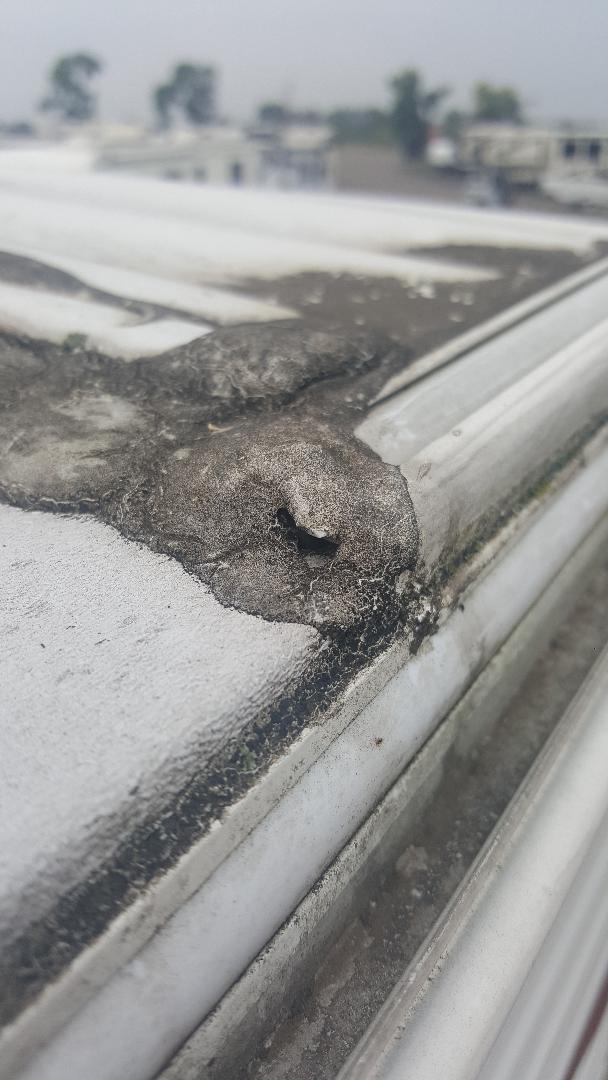
Hole in the roof caulk.
If you see anything that looks like water could go through wash the roof caulk with soap and water let it dry. Then apply new roof caulk on top of the existing roof caulk. Do NOT try to take the old roof caulk off. You will destroy your roof in the process. Just put a bead of caulk over the top of the old caulk. The appropriate size bead is about the size of a pinky finger. RV Roof Caulk is self-leveling and it will flow right out and look great (making you look like a professional).
Note: most travel trailers do not have “walk on” roofs. This means that you CANNOT walk across the top of them. If you are not sure if you have a “walk on” roof, assume that you do not. DO NOT WALK ON IT unless you are absolutely sure that it was made to be walked on. Here is a tricky part…If you do need to get up on the roof to do a repair…crawl. This will help to distribute your weight so that it is not on just one small section of the roof. Just try to keep your weight on the trusses. The trusses will be about 18 inches apart. You should be able to feel them under you while you are crawling.
If the roof has some significant damage to it. There is a tape available at RV dealerships. This tape will stop the leak and cover the hole in an emergency. The tape is very expensive and may last about a year or so but it is not the fix-all. I recommend you contact your insurance company.
When we are repairing a rubber roof at the dealership, we remove everything on the roof. We remove the vents, air conditioner, and trim. We then remove the rubber roofing and install a new sheet of rubber on the roof. This rubber sheet is one piece front to back. Then we reinstall the vents. It is very time-consuming and must be installed properly or it can bubble up due to the wind and rip off the trailer while you are going down the highway. I don’t recommend the average RV owner replaces their own roof. Take it to your service technician. Let your insurance company cover it.
Happy Camping!
RV Like a Pro is a participant in the Amazon Services LLC Associates Program, an affiliate advertising program designed to provide a means for sites to earn advertising fees by advertising and linking to Amazon.com.


41 Comments
Jocelyn
Good to know for future reference! Thanks for sharing!
Katie Mitchell
Great tips. My fiance and I still need to check out the roof of ours.
katie
It really is all the work of a second home, isn’t it???
Nicki
Sometimes it feels like it. 🙂
Angela
Great info, used to own a Diesel pusher and this would have come in really handy! 🙂
T.M. Brown
You always have such GREAT advice on how to prep and care for an RV. I know RV-life is something my husband has talked about (even envisioned) for the future. Posts like this will certainly help us make the best of it.
Nicki
Thank you so much! 🙂
Janice
Great lesson for someone that needs it
Deanna
Excellent tips, especially “do not walk on the roof” – there’s a sure way to need a new one.
Terri
Oh yes, I remember doing roof repairs to our RV when we had it. Actually, it wasn’t too bad. You’re right: maintenance is KEY. Great tutorial!
Nicki
Thank you! 🙂
Kim
I’ve always thought of an RV as a bigger car. But now I see that it is more like a small house! I wouldn’t have thought to inspect our RV roof, but this is a great reminder.
Lisa
I don’t own an RV, but I have friends and family that do! This info will be really useful for them! 🙂
Junell DuBois
Great tips for someone who likes to RV
Christa Ellis
Very helpful post! I wouldn’t have known about not walking on the roof. I figured you could because I see that ladder going up the back of many campers. I’m glad you mentioned it.
Erin
This is great. As a fellow full-timer (former), I can attest for some of the trials of living in an RV and the never ending maintenance. Thanks for the tips!
Arianny Rodriguez
I had no idea it requires so much work. Why would you have to walk on the roof?
Nicki
Sometimes you need to get up there to re-caulk or fix something else. Don’t walk unless you are sure your camper is built for that. Just crawl and try to stay on the supports.
Janine
Such a great, practical post for an RV owner. Thanks!
Amie Lara
I love how you guys are able to do the repairs yourselves.
Courtney
Oh my goodness. This happened to us last year when we traveled for 6 months. We had no idea and we got leakage from a big rain storm and then mold.
Michele
You always give such great tips…and make them understandable!
Nicki
Thank you! 🙂
Pauline
We just got a toy-hauler. Thank you for reminding us about all the important stuff to do when you have a trailer.
Jennifer Morrison
This is so important! An RV is such a huge investment, so care and upkeep is really just protecting yourself and your money. Thanks for all of the details!
Brianna
Thanks for sharing! Good information to have. I am trying to convince my husband that we need an rv.😀
Melanie Walsh
It took me a while to realize that putting off repairs was not a good idea. Sounds like the same thing is true in RV ownership. Those holes don’t look like big issues, but I’m sure the damage they can do is extensive.
Rosanna
Very useful information. Sharing worth my sister.
Monica
I know there’s a lot to maintain on an rv but I never thought about the roof! Very informative and good to know as we’ve thought about buying one a few times.
Susan Franklin
Great tips!
Tonya | the Writer Mom
I found it interesting that most RVs don’t have walk on roofs. I never knew that!
Mary
Your tutorials are so clear. Thanks for another great one!
Kathy Phillips
This is great advice. I wonder how many people actually check out the roof before the problem. You have great advice all the time. Things that people forget about when winterizing campers and before first use.
Kathryn at QuestFor47
Great tips! Just because you can’t see the roof, doesn’t mean you don’t have to be meticulous about maintaining it!
Kirsten
Great advice! Thanks for sharing!
Dennis
Love that you cover things that we sometimes overlook. Great post!
Lisa Williams
They always say the best roof leak you could possibly have the one that never happens. This can only be accomplished with regular roof maintenance which means re-sealing the seams and penetrations on a yearly basis. One way to keep it protected and maintains its excellent condition is to apply the best RV roof coating.
Penelope Smith
My parents have been considering getting an older RV this summer. I liked that you pointed out that you might want to caulk the roof again. Also, it might be smart to get a professional to help you fix the roof for them.
isabellajohn
If you want to keep your RV in great shape, it needs to have proper maintenance, and RV roof repair is a huge part of that. Preventative measures are also the best way to deal with water damage. By adding a liquid sealant to the roof before you notice any leaks or issues, you can prolong the life of the roof and avoid water damage at all.
Brooklyn Johnson
I like how you stated that if the roof has some significant damage to it, there is a tape available at RV dealerships that will stop the leak and cover the hole in an emergency. My RV was outside when we had a really bad storm, and now there are lots of damages that need to be fixed, and I don’t know what to do. I will definitely keep your great tips and information in mind when trying to take care of the roof of my RV.
Bob
I love your tip about looking for cracks or gaps in the roof caulk. That would make sense considering you don’t want cracks in the sealant letting water into the interior of the RV. My wife and I want to go see Mount Rushmore on a big trip. I’ll have to consider getting the RV checked before we head into rainy country.