Save MONEY buying a used camper! Here is what to look for.
So you have decided to buy an RV! A great way to save some money is to buy a used camper. There are A LOT of used campers available. Just look at your local Craigslist for a number of options. Keep in mind that your local dealers also have a selection of used campers. This is a good option as well. We have discussed the pros of both private party and dealership sales in another article found here. In this article we are going to show you what to look out for when you are checking out that used camper. This could save you $$$$!!
When buying a used camper you will want to inspect it thoroughly. Especially if you are buying it from a private seller. If you are purchasing from a dealer, some dealers will sell you a camper “as is”. “As is” means they will not inspect anything except to do a gas test. A better option is to have them to do a “pre-delivery inspection”. During this inspection (which is usually included in the price), the service tech will inspect everything on your camper and fix it (within reason) and let you know what they are unable to fix. Keep in mind that you are not going to get a Cadillac for the price of a Pinto. A cheap camper is cheap for a reason.
- Ladder to get to the roof (note: most dealers will not let you get on a ladder on their property for liability reasons).
- Flashlight to see in cabinets and dark places.
- Notebook to keep track of your findings.
- Electric tester or amp meter. For testing electrical outlets.
Let the seller know that you would like to test everything in the camper. Hopefully they will then have the camper ready for you (gas in the tank, plugged into electric, maybe even provide a ladder, etc). If they are not accommodating in helping you to inspect the camper it might be a RED FLAG. They likely know something is wrong and are trying to hide it.
-
- The first area to check is the exterior of the RV. This means getting on the ladder so that you can see and inspect the roof. Obviously, there shouldn’t be any holes. The caulking around vents, edges, and around the air conditioner should be intact. I do not climb in any used camper roofs as I weigh 250 lbs. If there has been any sort of a water leak the roof may be soft enough for you to fall through. If you must go the roof, crawl and try to stay on the trusses. You will be able to feel this by the sagging between the trusses. Be sure to also inspect the silicone above the windows, the door jams, and every protrusion through the side of the trailer.
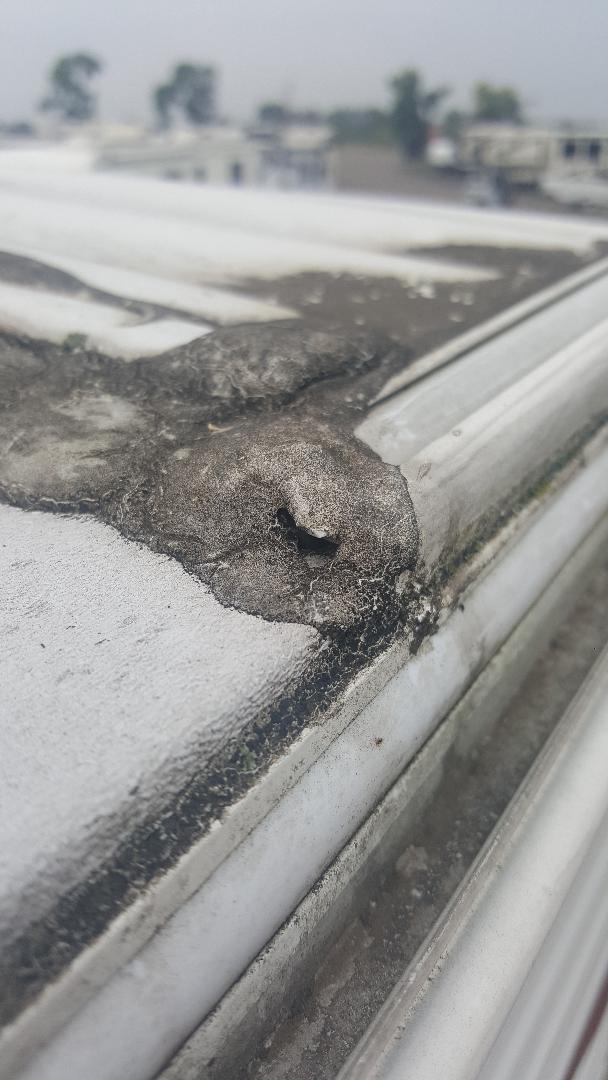 Hole in the caulking that needs to be re-caulked.
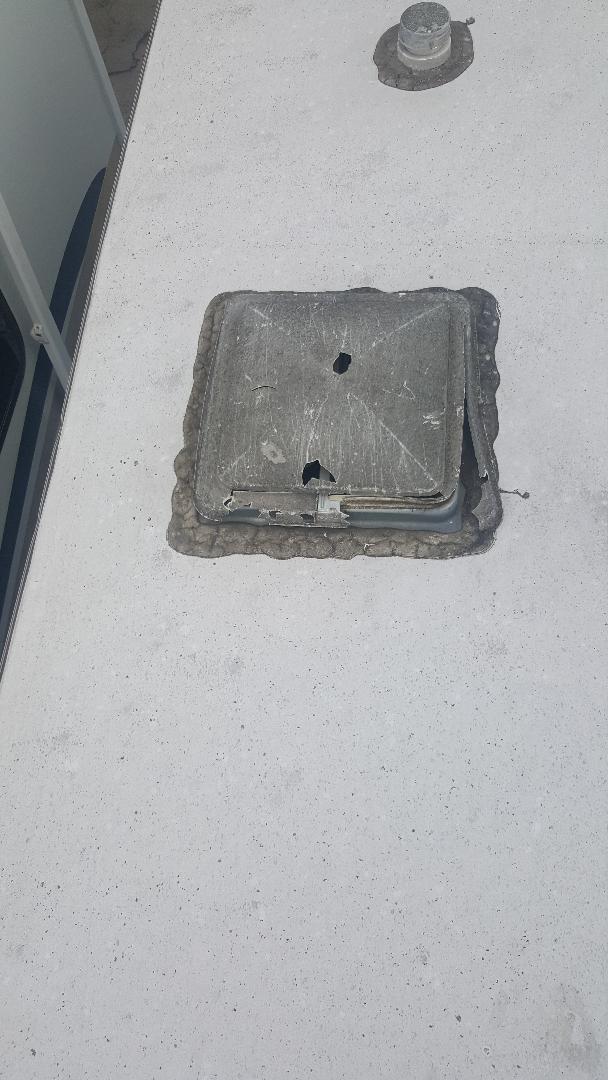
Hole in the roof vent cover.
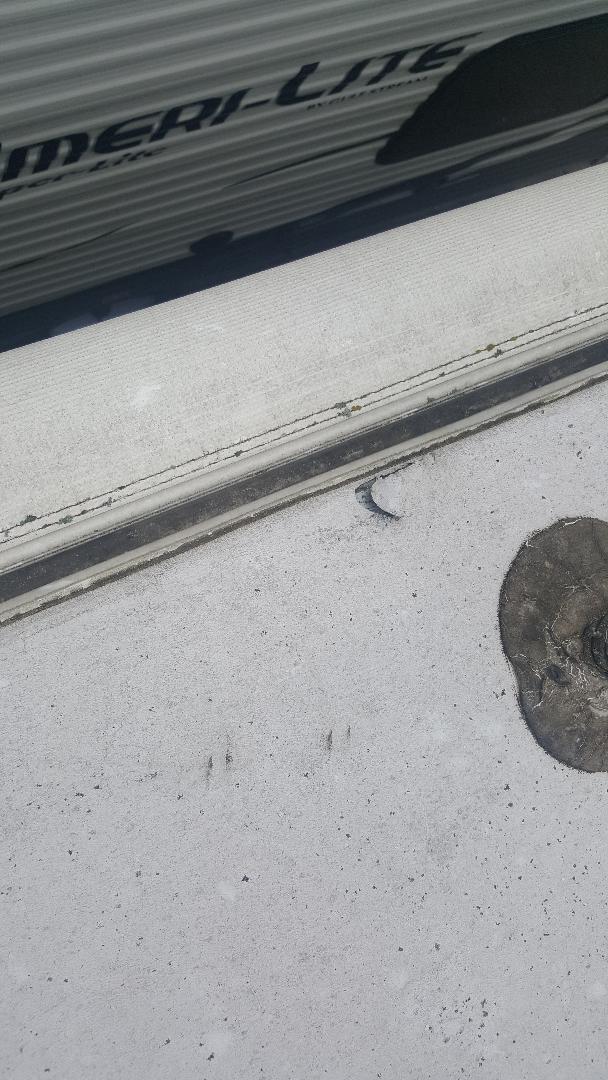
Tear in the rubber roof.
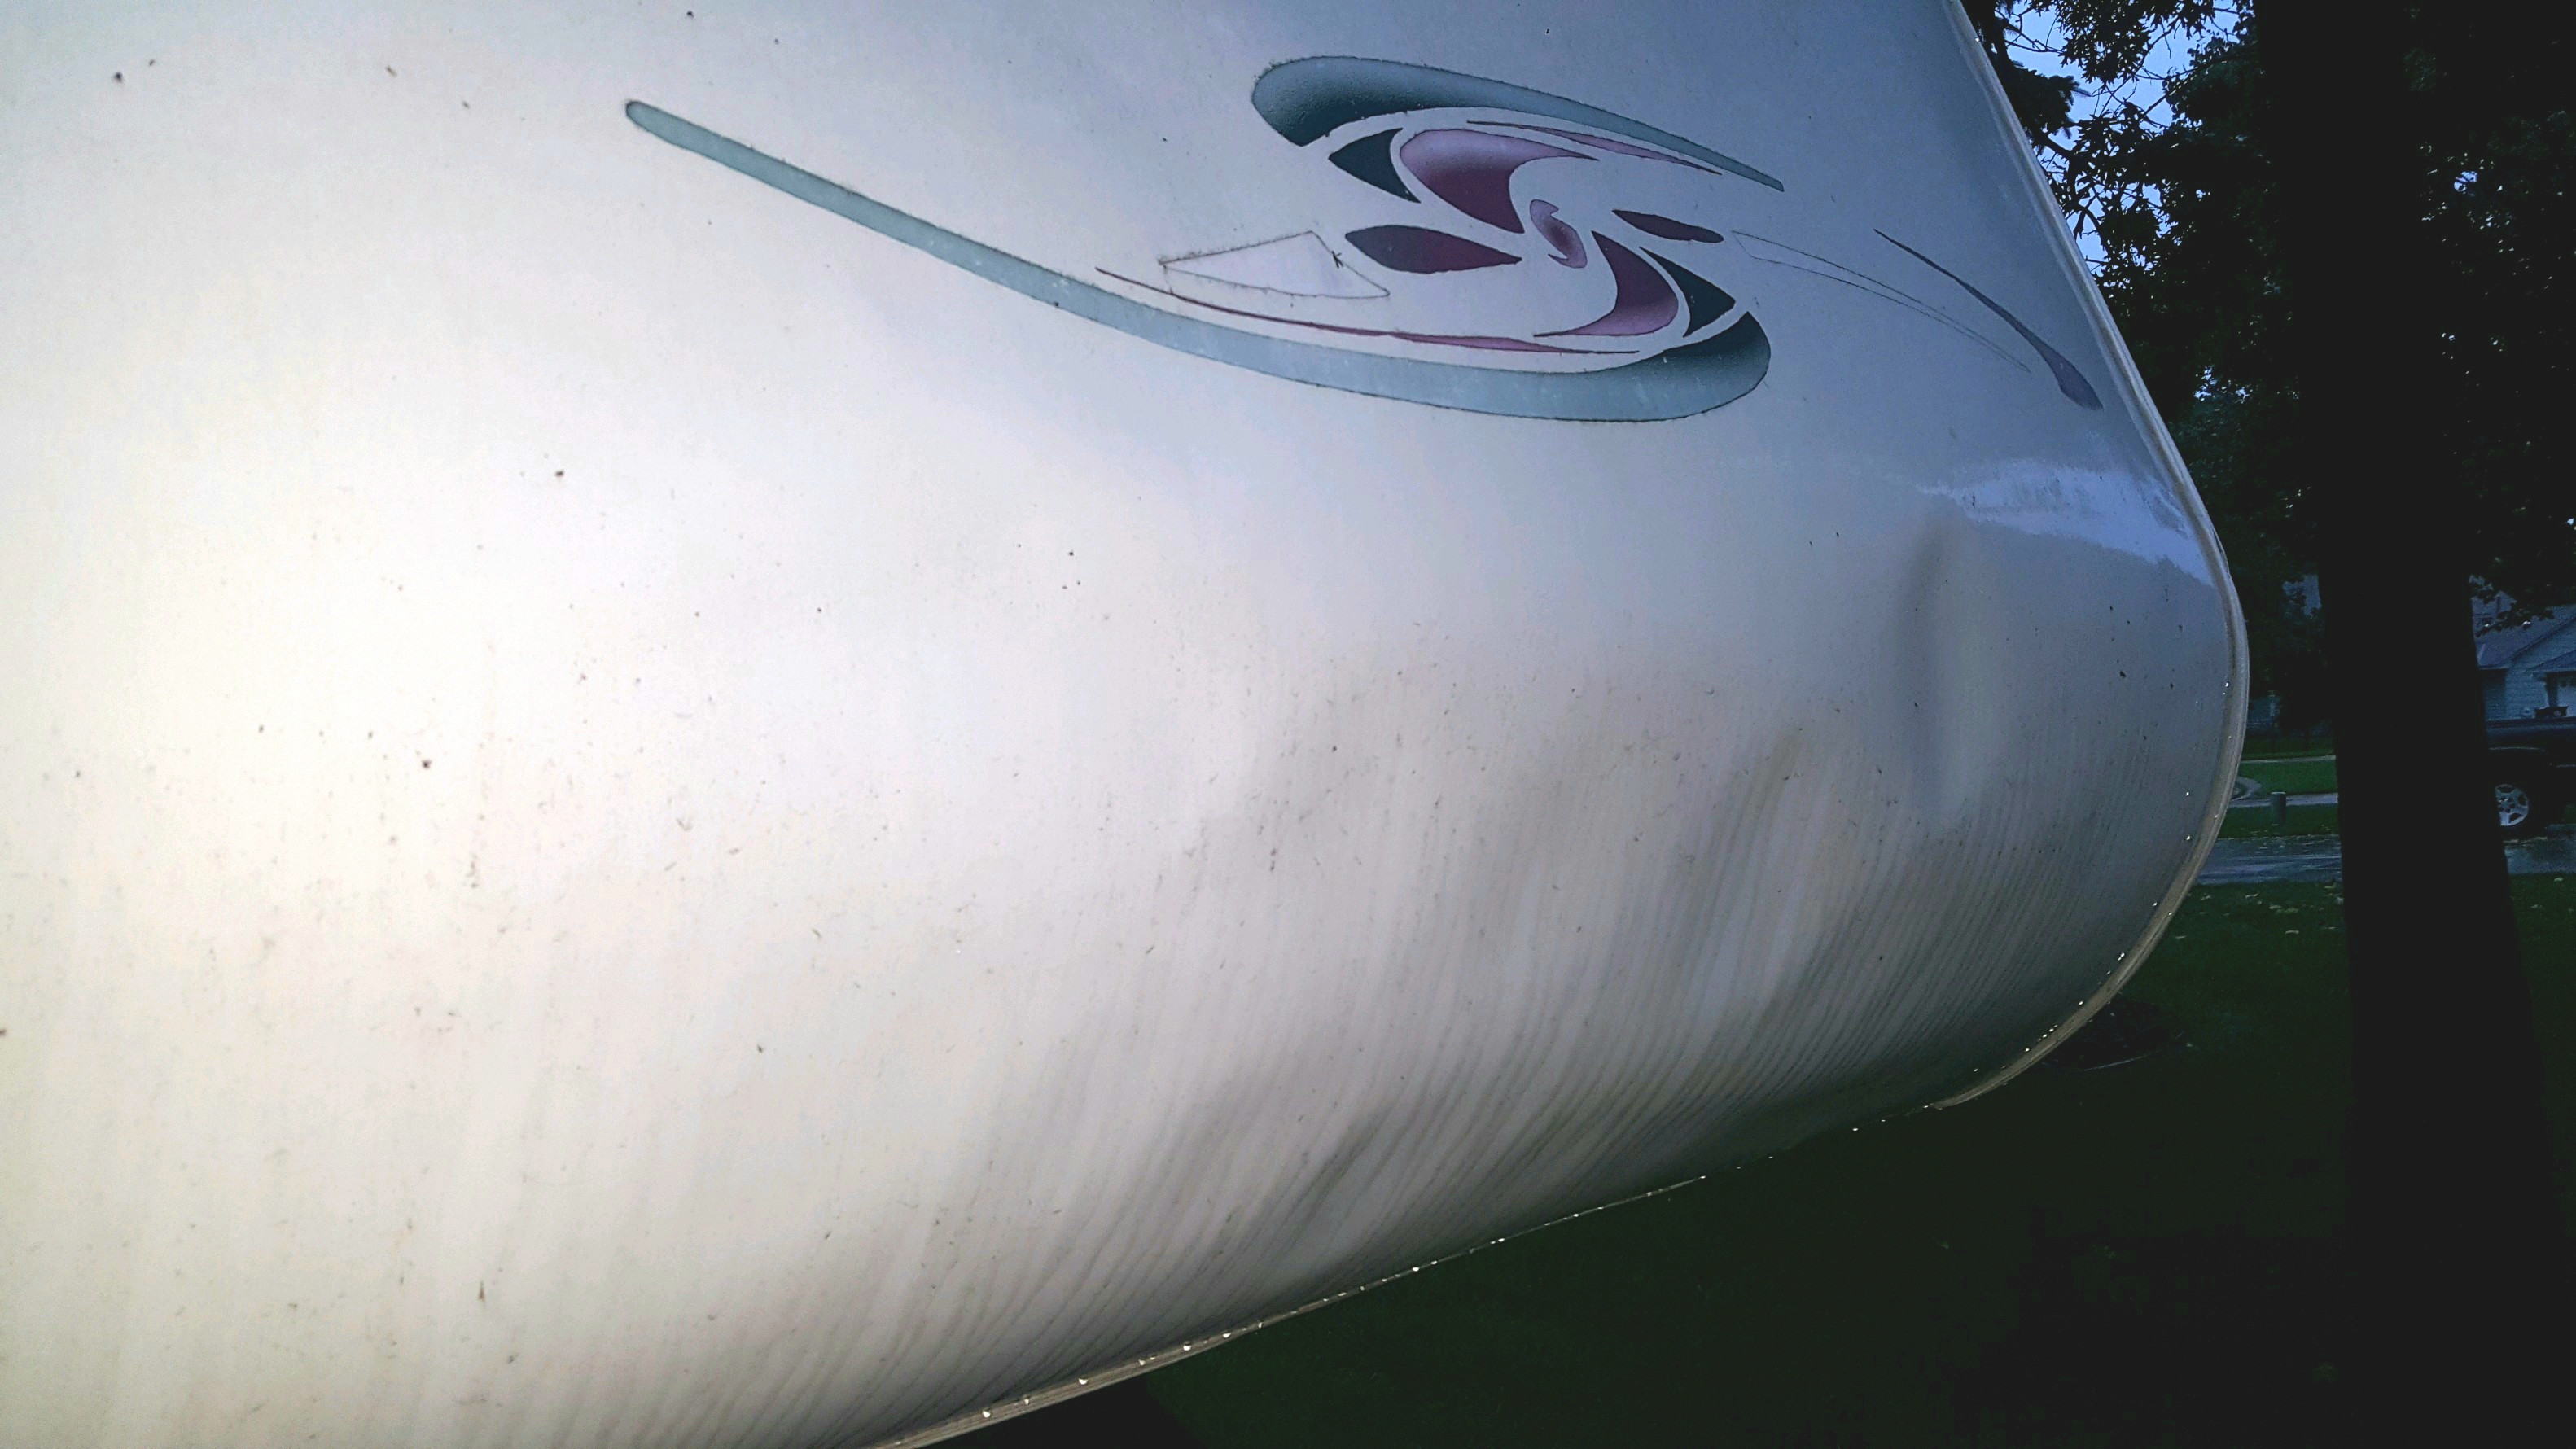
- One obvious sign of water damage is delamination of the outer siding. This has happened when you see ripples or waves or bubbles in the fiberglass siding. This very expensive to fix.
- Also on the exterior, pay extra attention to the slide room. While the slide room is in, or closed, the space all around the slide room edge should be even and the rubber gasket making contact all the way around.
- On the interior of the RV inspect inside the cupboards along the ceiling line. Water damage is fairly easy to see but you will want to use your flashlight for this. Also, if you smell a moldy or musty smell, water has somehow gotten into the camper.
- Also on the interior you need to look for stains or any signs that there was a water leak. Walk all the way around the inside of the camper, in small steps, and inspect the floor. Paying special attention near slide rooms as water often runs in if the slide room is not sealed properly. Soft spots are a problem. If you find soft spots under a window or near the bathtub there was once a water leak and might still be one. Any water issues are going to cost a lot of money to fix properly. Flooring is made out of press-board and once it is wet it just swells and gets worse. The only way to fix it right is to cut it out and replace it.
Slide Rooms
- If the camper has a slide room (the wall that goes out to make more room in the camper) make sure that it moves in an out properly. You will also want to inspect the rubber seals on both the inside and outside. These seals should be making enough contact that water will not get though.
- When the slide room is in, or closed, you will want to go inside the camper and look for any light or gaps in the rubber seals. This could be a source of a leak.
- When the slide room is out, or open, you will want to make sure that it goes all the way out. Run your hand all the way along the edge, feeling the rubber gasket and inside wall, to ensure that it is even.
- Again, with the slide room out, go outside and inspect all of the rubber gaskets, side walls and roof. Often there is A LOT of junk (dirt, leaves, I have even seen little trees growing) on the top of the roof of a slide room. Clear it off and inspect the slide top rubber. If it is really bad, this may be a sign the previous owner did not do the proper maintenance. This is a big red flag.
Accessories
- Check the water pump. This means turning it on and pressurizing the water pump. It should build up pressure and then stop making a noise. If the pump cycles and makes any noise 20 seconds or 30 seconds after you pressurized the system you may have a water leak somewhere.
- Test the water heater on gas and electric. CAUTION: BEFORE TESTING THE WATER HEATER, MAKE SURE THE WATER HEATER IS FULL OF WATER. Turning on a water heater while it is empty will melt the electric heating element in 30 seconds!
- Test the furnace and air conditioner. Turn on the furnace and feel the air coming out (it should be warm). Do the same with the air conditioner (it should get cool). Also, smell the air. If mice (or any other animal) got into the furnace or air conditioner the air may smell bad. This smell could be difficult to get rid of.
- Test the refrigerator on gas and electric. The refrigerator will take 24 hours to cool itself down to the proper temperature.
- Walk around and check every light switch and receptacle. If one doesn’t work it could be as simple as a fuse or cricut breaker. Or it could be as bad as a mouse or chipmunk chewing your electrical lines.
- Check out the awning. Make sure it goes out and does not have any holes in it.
- Test the trailer jacks to make sure they function properly.
** We will cover testing gas appliances in another article.**
These are all expensive components and you will want to know ahead of time if there is a problem so you can negotiate the price.
Almost every used camper has had a mouse in it. After all, campers are warm, easy for them to get into, and often have food in them. When I am inspecting a camper I look for signs of an infestation. Not just signs of 1 or 2 mice. When checking for an infestation, open cupboards, look under the stove top, look and smell everywhere for signs of mice. A couple droppings is easily cleanable. A huge nest, lots of dead mice, or huge piles of droppings, is another case entirely.


7 Comments
Nikki
This was super helpful! We are beginning the process of looking for an RV/Camper – no rush – but when we find something this will be a great checklist to be sure we are getting the best deal. My husband is pretty handy and smart in things like this, but never being an RV owner there will be things he wouldn’t think to look at. Thanks again!
Nicki
Awesome! Thank you so much! If you have any questions please let us know!
Larry
Very informational and thorough. I hope to be looking for one myself soon so I am glad to have these tips.
Ivy | livin the life of ivy
Love this! There are a lot of good points here. I would have never known to bring a ladder from inspection. At least now I know what to look for.
Sophie
Really helpful guide. Wish I knew all this when we bought our first van! Thanks Fred and Nicki
Kristi @ Way Beyond The Norm
Great advice! I remember having to go through all of this when we purchased our first RV used. Then, when we bought new, it was an even longer list of things we checked and tested. The roof stuff is daunting, just because if there are problems there, there are likely problems elsewhere.
Holly Bird
This is a great post.. I have been looking and have not thought about some of the things you brought up, especially the roof! Thank you!