Leveling an RV
How to level an RV is something every RV owner needs to know. Sooner or later everyone divides the duties for who does what when you get to the campground. My job happens to be leveling the camper. To “level a camper” means to make sure the camper is level or even side to side and front and back.
Before we get started it is important to note that some of the links below may be affiliate links. This means that at no cost to you we may earn a commission if you click through and make a purchase. This is how sites like ours pay to “keep the lights on”.
If you are pulling a travel trailer, the first thing you should do once you have decided where the camper is going to be placed is to drop the stabilizer bars on the tow hitch.
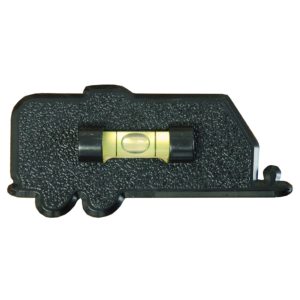
Now, regardless of what kind of camper you have you should level the camper side to side. Locate the level or look at the camper level that you may have affixed to the side of your camper.
If your camper is not level side to side you could use a camper leveler.
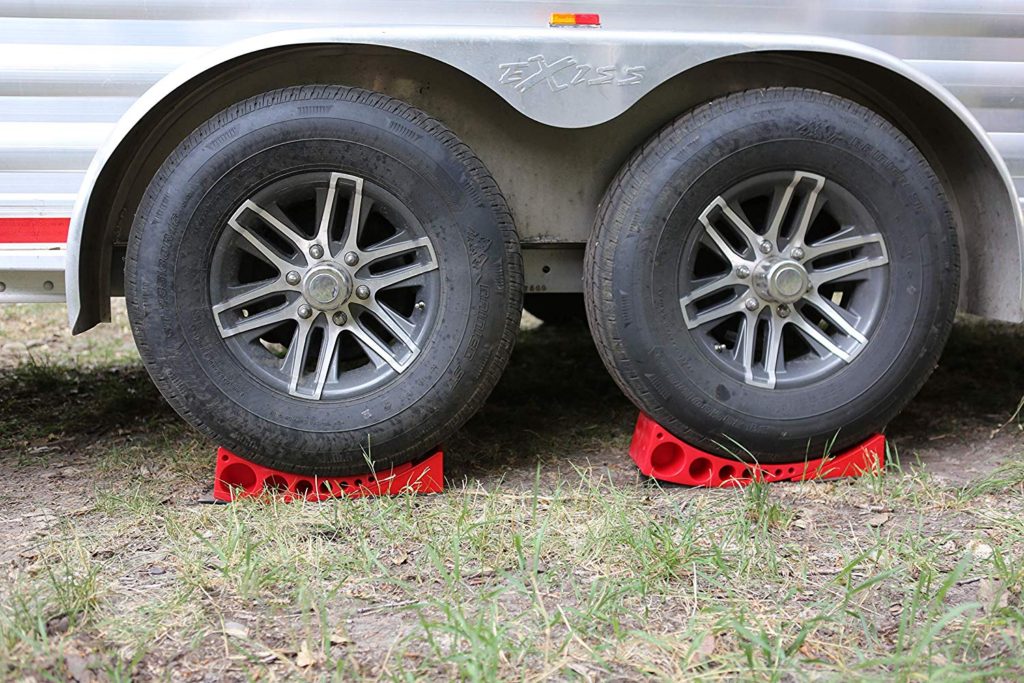
These levelers are super slick. You just put them behind the wheels on the side that you need to raise to make the camper level. Then drive the camper backward onto the levelers. The levelers will raise the side of the camper higher the further you drive on to them. Once you have reached level, stop, and put the chalks under the levelers. See the video below:
If you choose to not use a commercial leveler you can always use a 6 foot long 2 x 10 board. To do this, pull the camper forward with your tow vehicle. Then lay the 2 x 10 on the ground behind the wheels on the low side of the camper. Then, reverse the camper onto the board. If the camper is more than two inches out of level use another board or using a shovel dig a little trench where your other tires will set. Most campsites are pretty level and you shouldn’t need to do this. You should also check with the campground owners before you do any digging.
Note: If you have very large slide rooms , you may want to run them out and double-check the side to side level. Remember, it is often it is easier to run city water lines and/or sewer hoses before extend your side room.
Now that the camper is level side to side it is time to level it front to back. To to this, first unhook the camper from your tow vehicle. To level a travel trailer, us the tongue jack. To level a fifth wheel use the front grounding jacks/landing gear. Simply raise or lower the front end of the camper until it is level.
Stabilizer Jacks
When camping in a sandy area or where there is soft soil, I recommend putting a piece of 2 X 6 board or something else solid under the stabilizer jacks to give them a larger footprint to keep them from sinking.
I recommend putting the rear stabilizer jacks down FIRST then the front stabilizer jacks. The reason for this is that I want most of the weight of the camper to stay on the tongue jack/landing gear and tires. When using stabilizer jacks, you should only raise your camper an inch or two. It is possible to put too much weight on those two stabilizer jacks and they will bend.
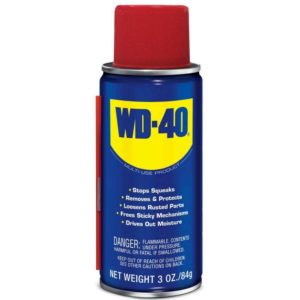
If you keep your jack’s lubed with WD-40 or something similar their operation is much easier.
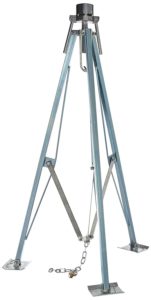
Note: Fifth wheel owners may want to also use a tripod stabilizing system to help stabilize your camper
Manual Stabilizer Jacks
To use manual stabilizer jacks you can use the wrench that came with your camper or you can use a cordless drill with a three-quarter inch socket. Using the drill is much more efficient. It is what most people use.
With manual stabilizer jacks it is possible to raise one side of your camper an inch or so higher than the other side to help level it.
Power stabilizer jacks
Power stabilizer jacks usually have one button for the front two stabilizer jacks and a separate button for the rear two stabilizer jacks. When extending a set of stabilizer jacks usually one side will go down and touch the ground then the other side will go down and touch the ground, then both sides will operate and stabilize the camper together.
Power stabilizer jacks do not level the camper at all.
I have also heard complaints that once in a while the stabilizer jacks will sink in the dirt or retract a little. If this happens hit the button extend the jacks a little farther.
Auto leveling system
To use a power auto-leveling system in your camper make sure everything (picnic tables, bicycles, etc.) is clear of the camper. Including your tow vehicle. Then push auto level.
The camper will sometimes drop in the front end which is why I want you to move the vehicle clear. Then, the camper will raise back up level and automatically put down the rear (and if so equipped) middle stabilizer feet. These auto levels do work on a timer. If it is a very large RV, windy outside, or if there is a large person moving around in the camper, the auto level may time out before the camper is level. If this occurs, simply push the auto level button again.
Note: Do not run your side rooms while you are auto leveling your camper.
Slideroom /power jacks operation
Side rooms, power stabilizer jacks or tongue jack operate using the 12 volt battery mounted on the front of your camper. Each of these will work a little smoother, and faster, if you are plugged into either your tow vehicle (while it’s running) or plugged into 110 power with your power cord. The reason it operates smoother is because you will have more voltage going to the power equipment.
A battery alone puts out 12 volts. The converter in your camper (while plugged in) puts out 13.5 volts. The alternator in your tow vehicle will put about the same amount of voltage to keep your battery charged.
Happy camping!


18 Comments
Julie
Some day we will RV across the country and your site seems to have so much useful info! Thank you!
Ramae Hamrin
Great information here! Loved the video tutorial too. They made it look SO easy to drive it up on those stabilizers. I don’t think I would do it that smoothly! Plus, I need myself an RV first. Enjoy your posts!
Anna
Those camper levelers are really great! Will surely get them as soon as we get on the trip. We have 3 dogs, so RV travel would be the best for us. We hate to leave our pups at home. Thanks for great tips!
Kim
Great resource! I would have never suspected that so much goes into RVing…love the video too!
Holly Bird
What a great article and the video is really good, makes leveling very easy to do!!
Cindy
It’s a job someone has to do! My parents owned RVs. I never realized all that needed to be done after arriving at the park or site.
Tricia Snow
Great instructions and help for leveling your trailer. Love the tools!
Michele
Great read for any RVers or want to be RVers!
Meagan
Very helpful. I would probably not be good at driving an RV…
Katie Mitchell
Great info. We definitely want to invest in an auto leveling system.
Stacey
Great post! This post reminds me of my parents having arguments while leveling their RV. Oh, the memories. 😂
Jenny
Those Anderson Levelers look like a great tool. Sure beats stacking wooden planks under the tires!! I showed the video to my husband. He looked impressed. Maybe I can get him some for Father’s Day. Perfect for the start of the camping season.
Jennifer Morrison
These levelers look so cool! I can’t imagine how much easier they make life in the RV/Camping world!
Pauline
Those levelers are so cool. Thanks for all the great tips. We rarely camp anywhere other than the woods so these would come in handy.
T.M. Brown
This is such tremendous information for people who camp and RV. If we ever get to this point (trust me, Hubby would love this!!!, your site is definitely one of the two I would go to on a regular basis for help, tips, guidance….and wisdom!
Angela Greven
Wow, those levelers are super cool, never seen anything like them! Will share with our RVing friends 🙂 thank you!
Lisa
Can a trailer that is already set ,can it still be leveledcor do you have to get the truck hooked back up
Nicki
You can re-level it. It should be leveled when the truck is away from it. Use your stabilizer jacks. If you have it on blocks, you can use a floor jack. If you have auto-level, you can hit the button any time and it will re-level itself.