Getting your RV Ready for Winter
It’s time to start getting your camper ready for winter. The most important part of getting your camper ready for winter is winterizing the water system. This article is going to focus on the things to look out for, and the maintenance to do now, so that you are ready to enjoy your camper in the spring.
Exterior
Materials Needed
- 100% silicone should be used on the sides of an RV and around all the protrusions (doors, windows, running lights, brake lights, water hookups, etc).
- Self-leveling roof caulk should be used on the roof. Silicone will not stick on the roof of an RV. If you use silicone on the roof you will have a leaky camper by Spring.
Go to any RV store tell them you need “self-leveling roof caulk”. The parts manager will know what you need.
- Sides of the RV: Using a ladder and a tube of silicone, go around the outside of your camper inspecting all of the protrusions on the sides of the camper. Inspect the silicone on the top of the windows, on the top of the water ports, on the top of your door, and along any trim. Peel off any loose silicone. Put a nice bead of 100% silicone anywhere that water could get inside the wall.
- Roof of the RV:
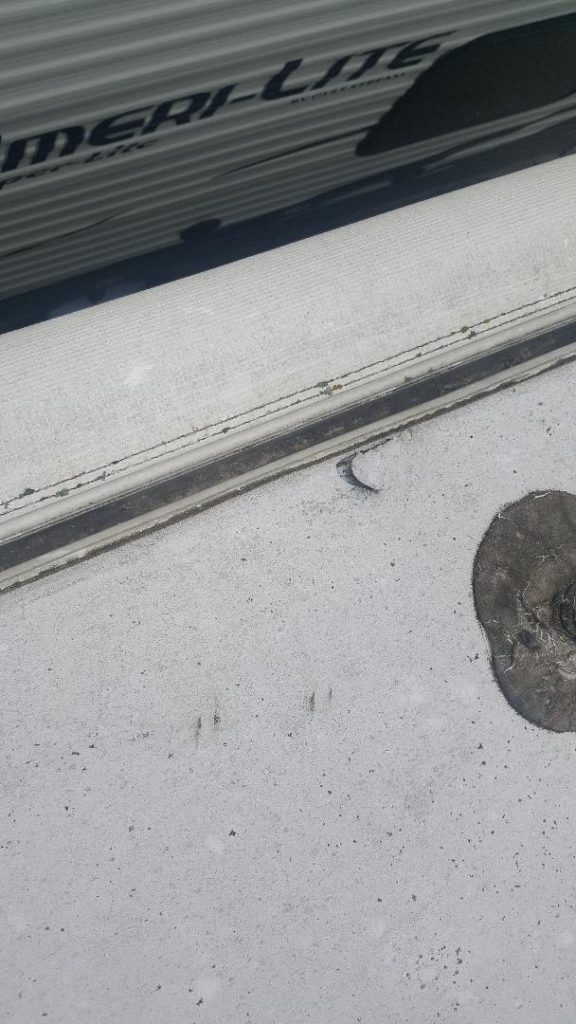 Go around the camper and inspect the roof. If you are not sure whether you have a walk on roof or not ASSUME YOU CANNOT WALK ON YOUR ROOF. Just get a ladder tall enough that you can climb up and look on your roof inspect your rubber to ensure that it is still intact. If you ever rubbed your camper on a tree going in or out of the campground the rubber may have torn (see photo above). Inspect the top of and slides to be sure that there is no debris. I have actually seen trees growing in the mud on the top of a slide. If there is any debris (acorns, twigs, etc.), wipe them off. Also look at all your seams on your roof, checking for any tears or separations. See below for an example of a hole in the roof caulking.
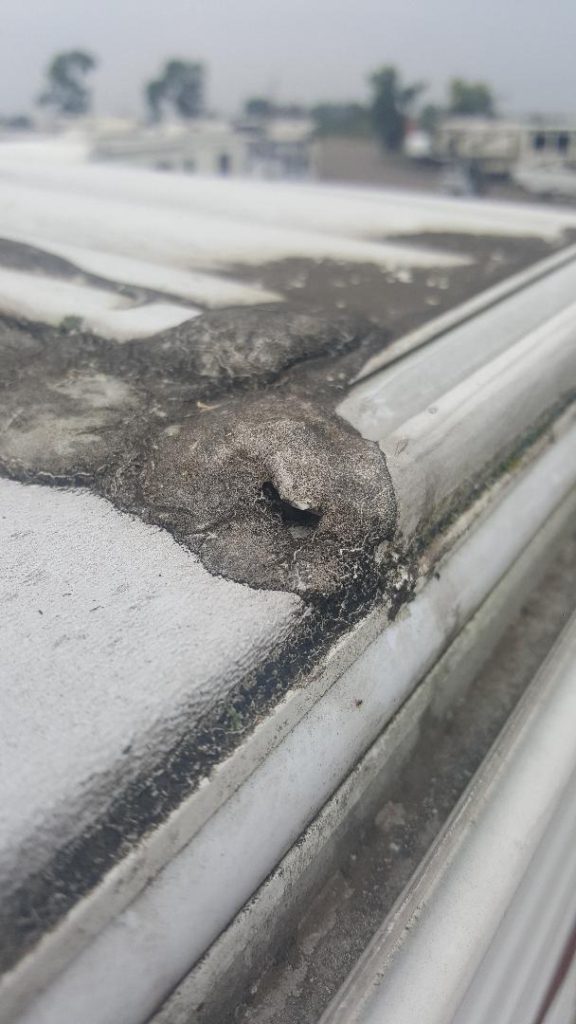 Also check along the front and back ends of the RV. Pay special attention to inspect wear on the areas that rubber meets metal. Especially, the back and the front corners. Water tends to puddle in these corners. Bad roof caulk = water damage to the RV.
- If roof caulk is cracked or looks like it needs some replacing wipe it with a damp towel and allow it to dry. Do NOT try to peel it off, you will likely damage the rubber roof. Then put a bead of roof caulk about the size of your pinky finger over the bad areas. The self-leveling roof caulk will flow right out cover nicely. This makes you look like a pro and cover your suspect areas.
Interior
What to check
- Go through the RV and take out all the food.
- Vacuum the cupboards and floor.
- Wipe off the counters and wipe out the drawers with a cleaning chemical.
Cleaning your camper will not only help get crumbs out of everywhere and off the floor but you will also be able to tell if mice have been inside the RV over the winter.
Mice
Your camper may have never had a mouse in it but maybe your storage location for your RV is full of mice. Or maybe you simply park your RV in a field. Or maybe the camper next to yours is infested. When they run out of food next door mice are bound to look for someplace new to go. Vermin are going to jump up on your tires, jump up and run along your frame. They will look for a nice warm place to spend the winter.
There are many ideas for keeping mice out of an RV. Some people believe in strong smelling chemicals to keep mice out of their campers. Others believe in peppermint oil or cedar chips. Another idea is putting dryer sheets all over the inside of the camper. Honestly, none of these are 100%. My favorite is opening up a camper in the spring and there is mouse poop right on the dryer sheet.
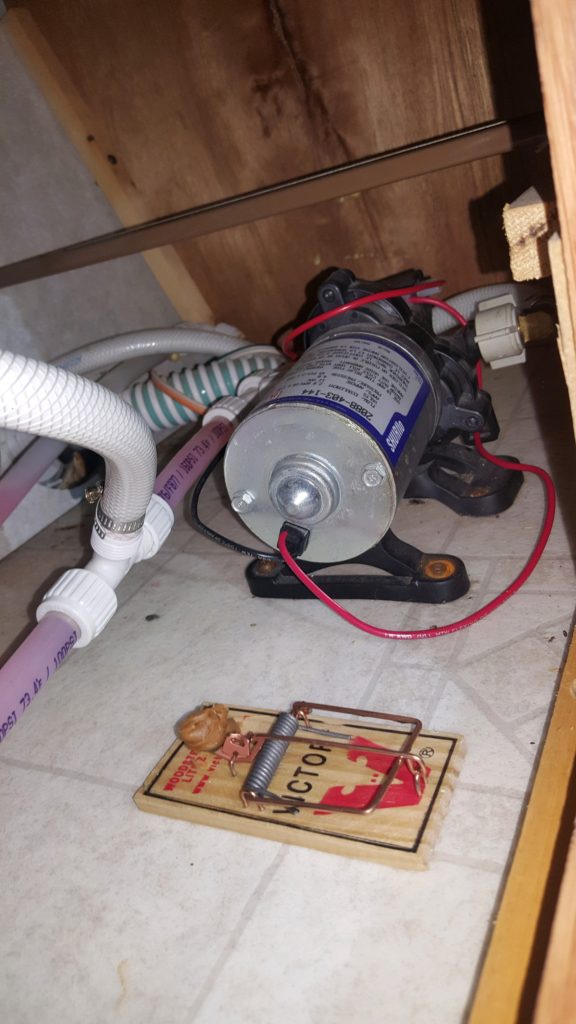
I recommend mouse traps. I sent them in the cupboards and along the floor once my camper is parked. If a mouse comes in hopefully I get them right away.
Leave your cupboard doors shut. If a mouse gets in one cupboard hopefully it cannot get out and have free reign of your camper.
The location most mice enter an RV is often it’s through a hole meant for a water line or electrical line or gas line. This allows them to get into the lower compartments.
We store all our paper towels and things that mice really like in the upper cabinets. If your cabinet doors are shut it is rare for anything to get up in them.
Final Checks
- Finally, before you park your camper for the winter, do one last inspection of your tanks. Be sure your fresh water tank valve is open. The valve for the fresh water tank is often located underneath the camper and usually drains out the bottom of the camper.
- Then, take one more look in your water heater make sure your water heater plug is out.
- Double check to make sure the slide rooms are in and the rubber seals are making contact. This will help prevent ice dams during the winter.
- I also recommend taking the RV dump station one last time before you put it away for the winter. I like to make sure my grey tanks and black tank are empty.
- Last but not least, once the RV is parked, disconnect the battery to save the battery from draining over the winter. If a battery drains, it then has the potential to freeze. To disconnect the battery you can either disconnect your negative battery cable and leave it off all winter, or remove your whole battery and bring it in your house and put it somewhere on a piece of wood over the winter. Either way I recommend recharging them in the spring.
Happy Camping!


24 Comments
Pam
This is so important! The last thing you want to do is be ready to go somewhere in the spring and unable to because of poor winterizing.
Melissa Parcel
Helpful article that should help RV owners.
Holly Bird
Great information! So many RV owners and this is important this time of year!!
Tricia Snow
Mice?? This is really good to know so you can be proactive rather than reactive.
Dennis
Great advice!
Kirsten
Mice!! Oh My!!
Mary
This is some really good information. It makes a lot of sense to winterize properly. Thanks!
Karie
I never thought of an RV having mice! EWW I will make sure I am prepared when we get ours. 🙂
Jennifer Morrison
There are so many details that go into ensuring that an RV will winter well, especially if trips are planned. This is a great resource!
Tonya @ the Writer Mom
There is so much to think about, I never would have thought of all these things.
Mom Life Optimized
We are so looking forward to RVing more in the future! Definitely a great article to help us keep our RVs safe and healthy. 🙂
T.M. Brown
Ummm….the mouse thing has been second guessing every doing this…..not a huge fan. BUT – I am not opposed to trying to overcome that feeling because the idea of traveling via RV sounds exciting.
Nicki
It’s really not that bad. Just set the traps and make sure to clean everything in the spring. We run all our silverware through the dishwasher in the spring just to be safe. I’m a bit of a germaphobe and it’s really not that big of a deal.
Rosanna
We don’t have an RV, but I habe family and friends that do. This is great information and I will be passing it on to them. Thanks for sharing.
Nicki
Thank you!!
Rosanna
I don’t have a RV, but I lots of family and friends that do. This is great information and I will be passing it on to them. Thanks for sharing.
Christa
This is suchhpful and detailed information! There are so many things I didn’t even think about before (like mice).
Kathryn at QuestFor47
What a comprehensive list! These look like critical factors for winterizing an RV.
Dee
I never knew everything that comes with winterizing an RV. Thanks for sharing!
Monica
I didn’t realize how much work went into winterizing an rv but makes sense. Very important and could be costly if not done right.
Kesha
I don’t have an RV but it sounds like getting your RV ready for winter is just like preparing your home or car for winter. It requires work to make sure it can sustain the harsh elements.
Nicki
Absolutely! Do a little bit of work on the fall to make your life easier in the spring!
Kathy Phillips
This is great information. I like how you have explained everything and the reason why. It is so important to winterize the RV, especially where I live where the temperatures can get to 0 or below. Thank you.
Tim Yaotome
Thanks for the tip to disconnect the battery before parking the RV during the off season. Aside from cleaning and fixing it, my tip for campers is to find a facility that offers RV storage. Knowing one can help a camper get a safe shelter for them that can reduce their exposure to the elements. Getting one will add more years to it too.